Create Sheets
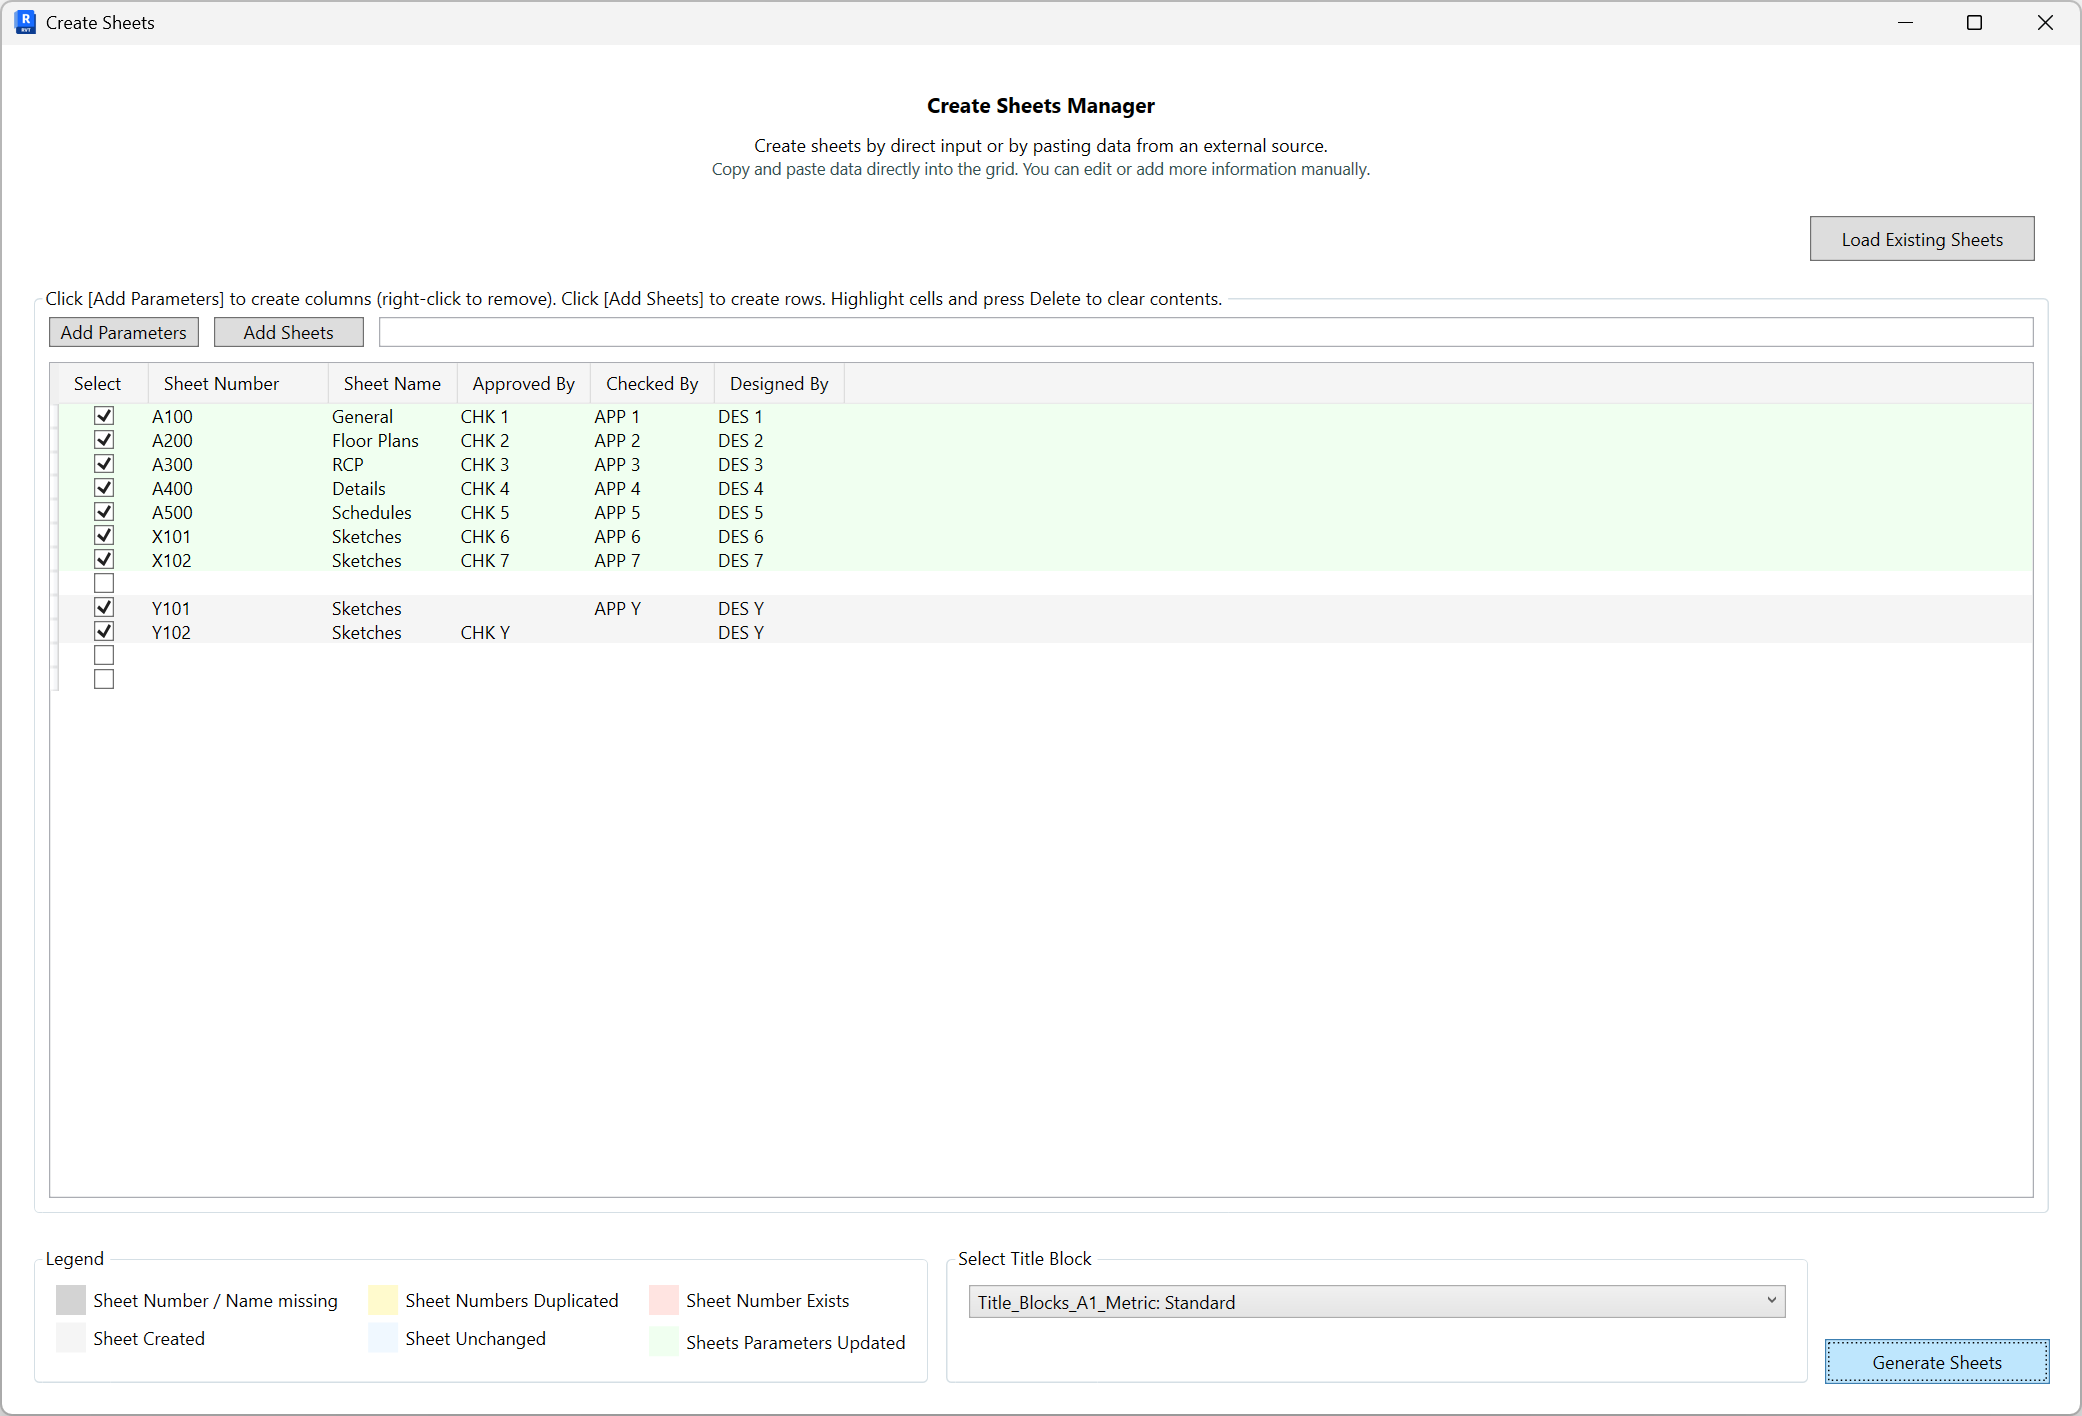
Create sheets by typing directly into a grid or pasting data from Excel. Add parameter columns, add sheet rows, review status highlights, choose a title block, then generate.
- Load or start. Click Load Existing Sheets to bring current sheets into the grid for reference, or begin with an empty grid.
- Add parameter columns. Click Add Parameters to open the selector and choose sheet parameters (e.g., Approved By, Checked By, Designed By). The grid adds a column per selected parameter. Right-click a header to remove a column.
- Add sheet rows. Click Add Sheets to create empty rows, then:
- Enter Sheet Number and Sheet Name.
- Fill selected parameter cells (e.g., CHK 1, APP 1, DES 1).
- Copy/paste from Excel directly into the grid to populate multiple rows at once.
- Highlight cells and press Delete to clear contents.
- Review status highlights. The legend indicates:
- Sheet Number / Name missing
- Sheet Numbers Duplicated
- Sheet Number Exists (already in the model)
- Sheet Created, Sheet Unchanged, Sheets Parameters Updated
- Select title block. Choose the title block family/type (e.g., Title_Blocks_A1_Metric: Standard) used when creating sheets.
- Generate. Check rows to process, then click Generate Sheets. Selected rows become sheets; parameters are set; existing sheets update where applicable.